
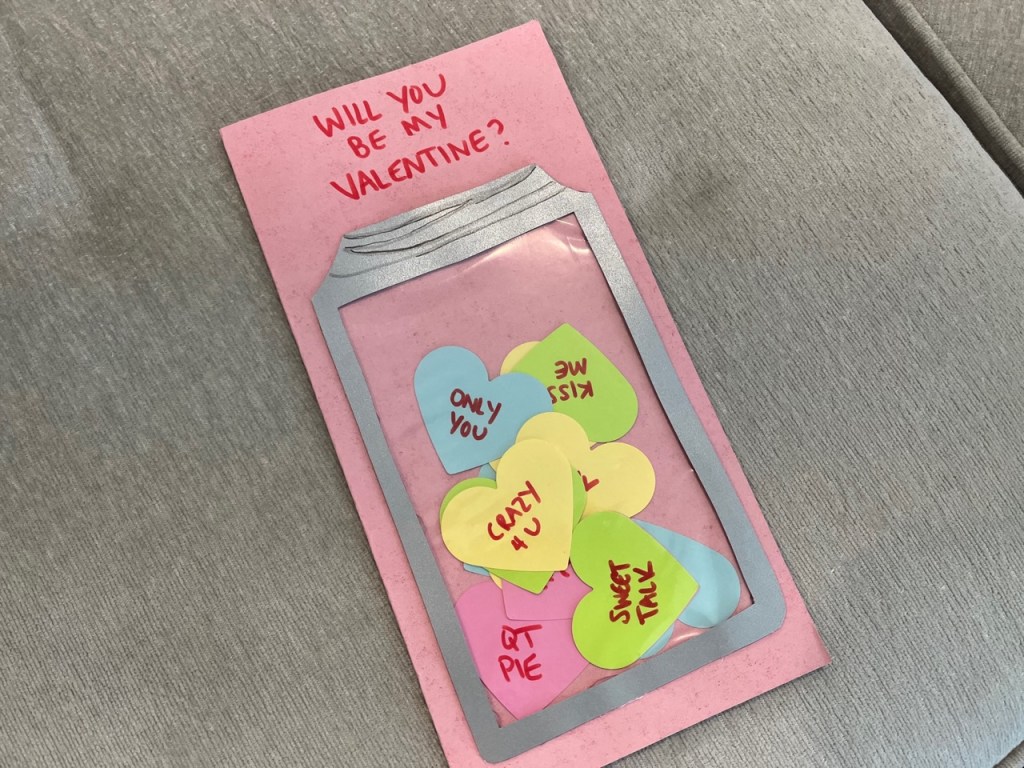
Finding or making the perfect Valentine’s Day card for your special someone can be difficult. Impress your valentine with this candy hearts jar card! This post will give you step by step instructions to make this homemade valentine card.
This card is particularly cool because the candy hearts inside the jar can actually move around as you shake the card rather than being glued down to the card. This means the card can have a different look depending on where the hearts end up plus it will be especially impressive!
Benefits of making a valentine card vs. buying one at a store
There are lots of benefits to making a valentine card by hand instead of picking one out at at a store.
- Personalization: A handmade valentine card allows you to completely personalize it to the recipient.
- Shows you care: Making a card by hand for someone will really show you care to take the time and effort to actually make a card
- It’s fun: In addition to impressing your valentine, a handmade card is really fun to make!
Supplies needed to make this candy hearts jar handmade valentine card

Here are all of the supplies you need to make this DIY Valentine’s Day card.
- Cardstock paper in a variety of colors
- A gallon size plastic zip lock bag
- Scissors
- Markers
- Heart shaped hole punch
- Exacto knife
- Hot glue gun
10 steps to make this candy hearts jar homemade valentine card
Now that you’ve gathered your supplies, let’s make a homemade valentine card!
1. Fold the base of your card

The first step to make this candy hearts card is to fold the base. To allow more room for the jar, I used a 12 in. x 12 in. cardstock base. This can be any color you want it to be. I used light pink, but you can pick any color that the recipient likes or that would compliment the jar and candy hearts.
Fold the paper in half and then set aside.
2. Cut out the jar shape

The next step to make this homemade valentine card is to cut out the jar shape from a piece of gray or silver cardstock paper. This will be a rectangle with rounded edges on the bottom and concave corners on the top for an extra bit to create your jar top.
Before cutting, just make sure that it is small enough that it will fit on to the base of your card that you folded in step 1.
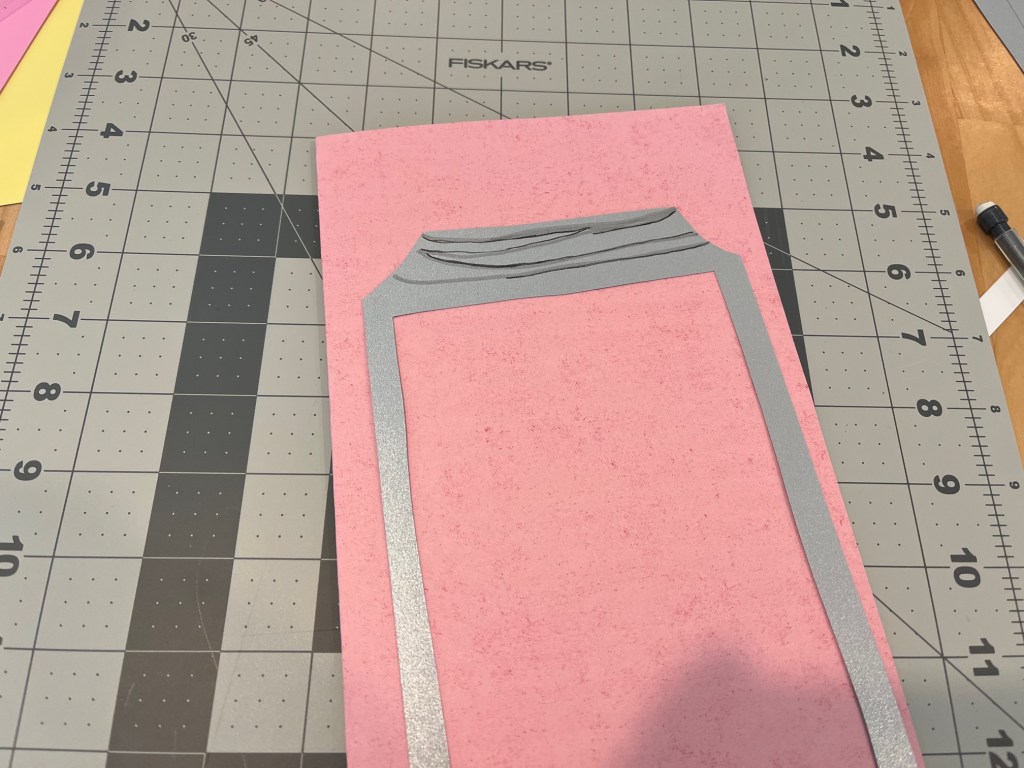
3. Cut out the inside of the jar

Once you cut out the jar shape, you will cut out the inside of the jar so you are left with just the outline. Using an Exacto knife to cut out the inside will be easier than using scissors, so if you have one I recommend using that along with a cutting mat to protect your table underneath.
Cut the inside out so that you have about a 0.5 in. frame with extra on top for the top of the jar. It should look like the cutout in the photo above.
4. Add dimension to the top of the jar
Once your jar is cut out, the next step to make this homemade valentine card is to use a marker to add some extra detail to the top. Using a gray and/or black sharpie, add some lines to the top of the jar to give it the look of having ridges like a typical jar would.
Now, you can set aside this jar cut out for a few minutes.
5. Cut the zip lock bag

Next, you will take your gallon size zip lock bag and cut out a rectangle to be the “glass” of your jar. Typically, zip lock bags have labels printed on one of the sides so you will want to cut out from the plain clear side removing any part of the zip top.
It’s okay for this to not be exact dimensions, as long as the rectangle is big enough to fill in the entire jar.
6. Glue the gray jar outline to the bag cut out

Now you will take the gray jar outline you created in steps 2-4 and gluing it to the plastic bag cut out you made in the last step.
You will likely have extra plastic on the sides, so once glued together you will take your scissors and cut around the gray paper so that there aren’t any plastic edges sticking out anymore. Then, set aside the jar.
7. Cut out paper hearts in a variety of colors

The next step to make this homemade valentine card is to cut out the candy hearts. You can do this freehand, but to get perfect hearts of the same size every time I find it easiest to use a heart shaped hole punch.
Use a variety of colors to look like assorted candy hearts. I chose a light blue, yellow, pink, and green to look like your typical candy hearts but you can mix up the colors if you’d like.
Cut out about 12 hearts or however many you’d like to “fill the jar” with.
8. Write out the candy heart sayings

Now that you’ve cut out all of your candy hearts you will write out your messages. To mimic a typical candy heart, I used a red marker for all of the sayings.
Here are some ideas you can use for your candy heart sayings:
- Be Mine
- Text Me
- Call Me
- Luv U
- Sweet Talk
- Crazy 4 U
- Puppy Love
- Forever Yours
- Melt 4 U
- Only You
- Hug Me
- Kiss Me
This is also one of the ways you can really personalize the card to the recipient and your relationship by making up your own sayings. For example, if you like to video chat a lot, you could write “Facetime Me” instead of “Call Me”. Really have fun with it!
9. Assemble the jar on the card

Now that all of the pieces are ready, the next step to make this homemade valentine card is to assemble the jar on to the base of the card you folded in step 1. The best way to do this is to put all of the hearts on to the base of the card and then glue the jar over them.
Be sure to adjust the hearts and jar placement first before committing to gluing it down. I used hot glue for this step but you can use whichever adhesive you prefer.
Glue only the edges of the jar down vs. gluing all of the hearts to the card so that they can move around inside like an actual jar or box of candy hearts.
Also be sure to leave enough room at the top or bottom of the card to add your message.
10. Write out your message on the top

The last step to make this homemade valentine card is to write your message at the top of the card. Such as, “Will you be my valentine?”
I used a red marker to compliment the words on the candy hearts.
Those are the steps to make this candy hearts jar homemade valentine card

Now your card is ready to go! All you have to do is write your message to the recipient inside the card.
If you try out this homemade valentine, let us know how it turns out!